
[ad_1]
At this time, I need to share my favourite approach for Lightroom pores and skin tone changes when modifying portraits.

For years, I used photoshop for modifying all my photographs. The method of fixing pores and skin tone in Photoshop is advanced and time-consuming. First, I needed to consider the RGB values for every shade channel and after I’d modify every shade channel individually.
I by no means appreciated the Photoshop pores and skin shade adjustment workflow.
In Lightroom, the method of adjusting the pores and skin shade takes 10 seconds at most. And it’s enjoyable.
As a journey photographer, 99% of my portraits are taken outside. And since it’s not a managed surroundings, there are a selection of things that have an effect on the pores and skin shade of my topics.
The solar is the obvious issue. Plus, reflections of the surroundings contribute to the colour shifts.
Associated: Lightroom Portrait Enhancing
It signifies that just about each portrait I take requires pores and skin tone adjustment.
Tips on how to Carry out Lightroom Pores and skin Tone Repair
Right here is the define of my 2 favourite methods.
1. Handbook Lightroom Pores and skin Tone Repair Method
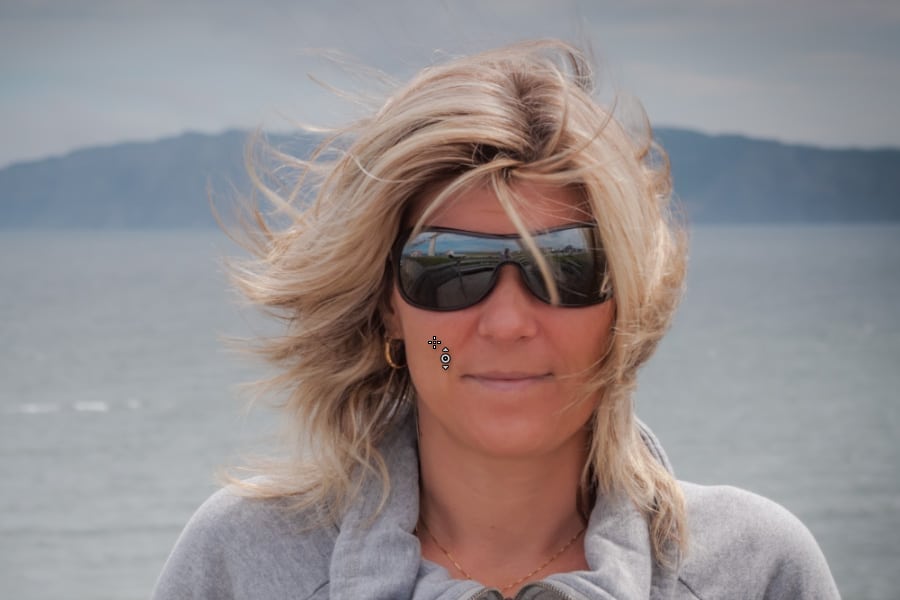
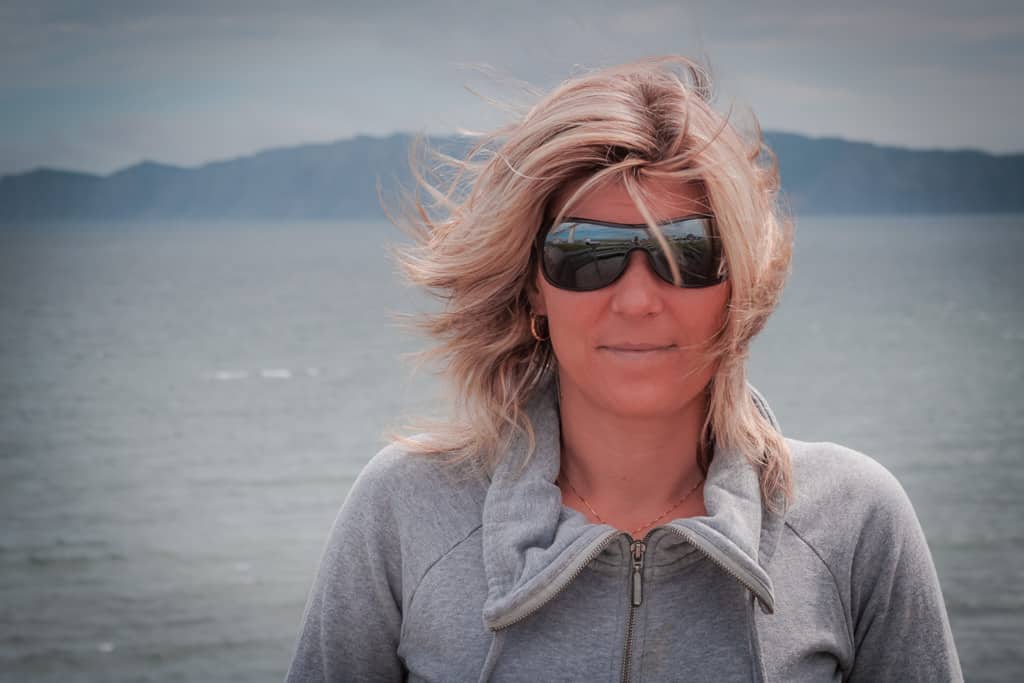
This portrait was taken in the midst of the day on the Atlantic coast of Canada with the solar shining excessive within the sky. In consequence, the pores and skin shade of the mannequin is shifted towards crimson hues.

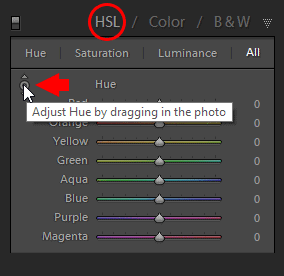
In Lightroom Develop Module find HSL (Hue Saturation Luminance) Panel.
Within the Hue part, click on on the rounded icon with two arrows pointing up and down. If you mouse over the icon you will note the textual content “Alter Hue by dragging within the photograph“.
Subsequent, find the pores and skin space which is correctly lit and click on on it.
With out releasing the mouse, begin dragging it up or down.
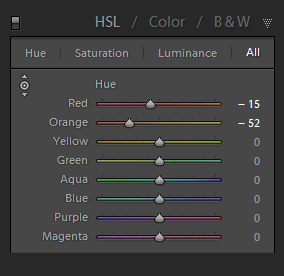
In case you drag the mouse too far UP the pores and skin shade turns into unnatural yellow. On the similar time, you’ll be able to see how the values of Pink and Orange hues will change.
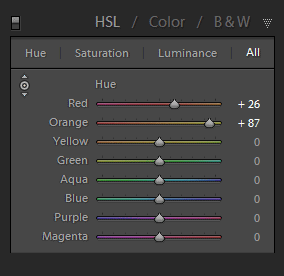
And when you drag the mouse down, the pores and skin shade tone shall be shifted in direction of crimson.
The purpose right here is to search out the precise stability between Yellow and Pink to attain a pure pores and skin tone.
Associated: My Prime Lightroom Workflow Ideas for
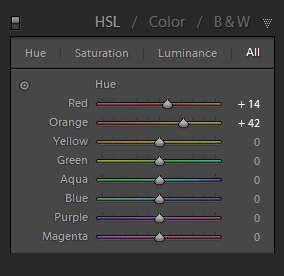
By dragging the mouse UP and DOWN I managed to search out the candy spot. The Hue values of Pink +14 and Orange +42, give me the precise pores and skin tone.

Further tip. In case you see that the pores and skin shade of your topic is oversaturated you should use precisely the identical approach within the Saturation part of the HSL Panel. By dragging the mouse UP and DOWN you’ll be able to enhance or cut back the saturation of the chosen colours.
See additionally: Tips on how to Soften Pores and skin in Lightroom
2. Preset Primarily based Pores and skin Tone Repair Method
If you’re utilizing my new workflow bundle, the Journey Professional Package, you’ll be able to modify pores and skin tone in your portrait images by utilizing the presets.
Find the TOOLKIT for Landscapes preset assortment and open it.

The TOOLKIT for Landscapes is a set of adjustment presets that assist us to protect folks’s pores and skin as naturally as potential.
A lot of the portrait adjustment presets (01-34) are devoted to treating areas of the pores and skin. You’ll be able to individually goal Shade, Saturation, Brightness, and Smoothness.
Since we are attempting to regulate the pores and skin tone, we have to use the Pores and skin Shade Shift presets (1-9).
It’s a strategy of trial and error. Merely click on by means of the Pores and skin Shade Shift presets and choose the one which produces the perfect end result.
01. Pores and skin Shade Shift (Yellow) + adjustment preset works finest for this explicit photograph.
You’ll be able to study concerning the 7 essential parts of the Journey Professional Package right here: Journey Professional Package Workflow Bundle
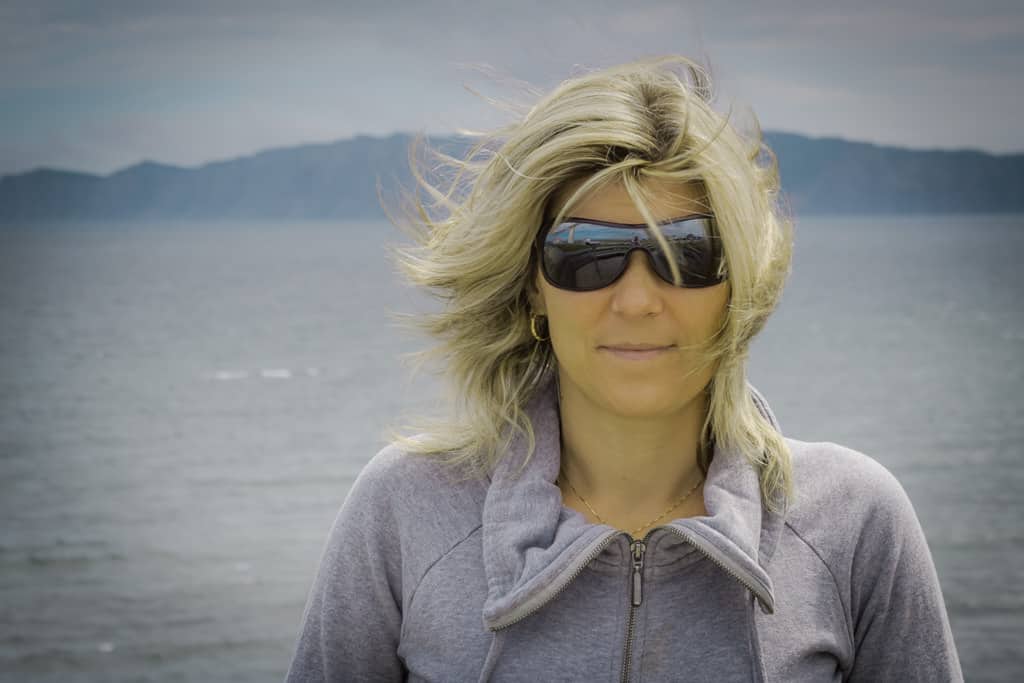
And right here is the Earlier than & After transformation. It took me 10 seconds at most.
And in case you are planning to print the portrait, don’t overlook to run it by means of Mushy Proofing to be sure to obtain correct colours.
Lightroom Pores and skin Tone Repair | Conclusion
The Lightroom pores and skin tone repair is an effective way to enhance your photographs. It’s straightforward to make use of and might help you get the right pores and skin tone to your photographs.
Articles Associated to “Lightroom Pores and skin Tone Repair in 10 Second or Much less“
[ad_2]